
Install PivotX via Softaculous in SiteWorx
A tutorial on how to install PivotX via Softaculous in SiteWorx.
1. Firstly log into your SiteWorx account. (e.g. www.example.com:2443/siteworx/ )
2. Then under SiteWorx Menu, click the Hosting Features menu item if it is not already open.
3. Then click on the Softaculous option.![]()
4. After that SiteWorx will open a Softaculous Interface.
5. Then on the left side of your screen, you should locate the Blogs category. Click on it and then click on the PivotX link that will appear.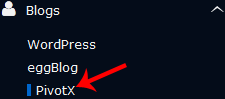
6. Click on the Install button.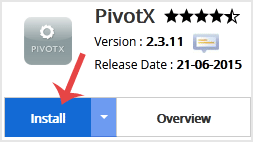
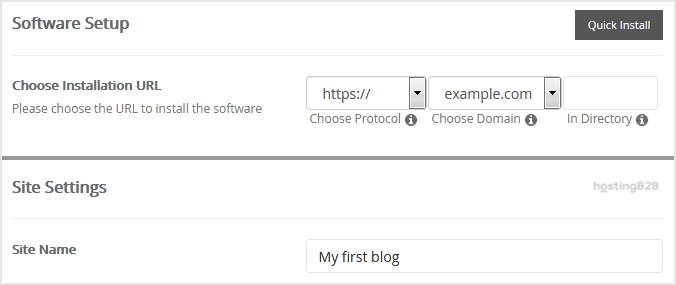
7. Fill the necessary field, under the Software Setup field:
- Choose Installation URL: Choose the appropriate protocol/domain. Inside the “In Directory” field, should you want to install this in a directory, i.e. example.com/directory, enter the directory name. Otherwise, leave it blank to install in your main domain, i.e. example.com
8. Under the Site Settings field, enter the following information:
- Site Name: Enter the name of your website, such as my first website.
9. Under the Admin Account field, enter the following information:
- Username: Your new PivotX username (for security reason do not use the Administrator or the Admin username.)
- Password: Use a strong password.
- Nickname: Nickname for the admin user account.
- Email: Your e-mail address.
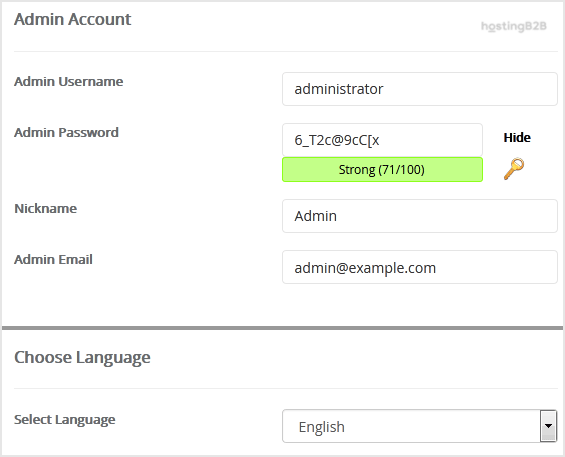
Note: Copy the admin username and password on a notepad because you will need these login details to access the admin area of your PivotX blog.
Choose Language: You can choose the language of your PivotX blog. The default language of PivotX is English.
10. Advanced Options: Leave this as it is unless you want to change the database name or take an automated backup. Please note that taking frequent backups may take a lot of disk space.
Finally, scroll down to the end of the page and click on the Install button.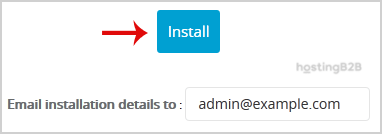
Congratulations you have installed PivotX via Softaculous in SiteWorx.
Visit our blog for more knowledgebase articles !
Recommended Posts


Top 10 Benefits of HostingB2B’s Managed IT Services
June 28, 2024