Deploying a new blogging platform should be a straightforward process. This guide provides a complete walkthrough to help you install Chyrp using the Softaculous auto-installer directly within your SiteWorx control panel. By following these simple steps, you can quickly launch your lightweight and extensible blog.
Table of Contents
Accessing the Softaculous Installer
Your journey begins inside your SiteWorx account. This is the control center for your hosting environment where you can access powerful tools like Softaculous. The first few steps involve navigating to the correct interface to begin the automated installation.
- Log into your SiteWorx account. The URL typically looks like www.example.com:2443/siteworx/.
- From the main dashboard, locate the Hosting Features section in the SiteWorx Menu. If the menu is not already open, click to expand it.
- Click on the Softaculous option. This action will launch the Softaculous auto-installer interface in a new view, presenting you with a library of applications ready for deployment.

Step-by-Step Chyrp Installation Guide
With the Softaculous dashboard open, you are just a few clicks away from having a functional Chyrp installation. This part of the process involves locating the Chyrp application and configuring the basic settings for your new website, including its location and your administrative credentials.
- In the left-hand navigation menu, find the Blogs category and click on it. A list of available blogging applications will appear.
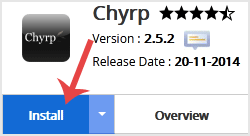
- Select the Chyrp link from the list to proceed to its overview page.
- Click the prominent Install button to open the main configuration screen.
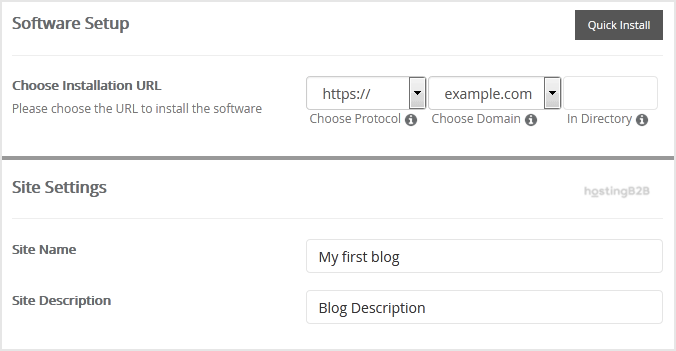
- Under the Software Setup section, you must define the installation URL.
- Choose Installation URL Select the correct protocol (http or https) and your desired domain name from the dropdown menus.
- In Directory This field determines where Chyrp is installed. To install it on your main domain (e.g. example.com), leave this field empty. To use a subdirectory (e.g. example.com/blog), enter the directory name here.
- Next, move to the Site Settings field to define your website’s identity.
- Site Name Enter a descriptive name for your new website.
- Site Description Provide a brief description of your site’s purpose.
- In the Admin Account section, create your secure login credentials.
- Admin Username Choose a unique username. For security, avoid common names like “admin” or “administrator”.
- Admin Password Create a strong, complex password to protect your account.
- Admin Email Enter a valid email address. This will be used for notifications and password resets.

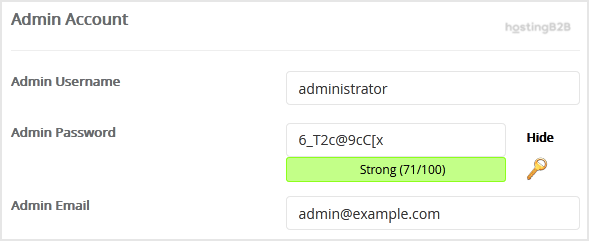
Important Note Be sure to copy your new admin username and password into a secure location. You will need these credentials to log into the Chyrp administrative area after the installation is complete.
Finalizing Your Setup
The final step involves an optional review of advanced settings and launching the installation. For most users, the default advanced options are sufficient. These settings control the underlying database and automated backup configurations.
- Review the Advanced Options section. You can leave these settings at their default values unless you have a specific need to customize the database name or change the automated backup schedule. Please be aware that frequent backups can consume a significant amount of disk space. Protecting your data with regular website backups is critical, but it requires careful resource management.
- Scroll to the bottom of the page and click the final Install button.
Softaculous will now automate the installation process. Once it is finished, you will see a confirmation message with links to your new Chyrp website and its admin login page. Congratulations, you have successfully installed Chyrp in SiteWorx.
After the Installation Next Steps
With Chyrp now installed, your work is just beginning. You can log into your admin dashboard using the credentials you created and start customizing your site’s appearance, creating content, and exploring its features. We encourage you to explore our other how-to guides to learn more about managing your online presence effectively on our reliable web hosting platform.
Frequently Asked Questions
Chyrp is a lightweight, open-source blogging engine. It is designed to be very simple and extensible, making it a great choice for users who want a minimalist platform without the complexity of larger content management systems like WordPress.
Softaculous is an auto-installer script library that is integrated into many hosting control panels, including SiteWorx and cPanel. It automates the installation of hundreds of web applications, saving you the time and effort of manual file uploads and database configuration.
Yes. During the installation process in Softaculous, you will see a field labeled “In Directory”. To install Chyrp in a subdirectory, simply enter the name of the directory (e.g. “blog”) into this field. If you leave it blank, Chyrp will be installed on your main domain.
If the installation fails, first check for any error messages provided by Softaculous, as they often point to the specific issue. Common problems include incorrect directory permissions or database connection issues. If you are a HostingB2B client, please contact our expert support team for assistance.
Your admin account has full control over your website’s content and settings. Using a strong, unique password is a critical security measure to prevent unauthorized access, protecting your site from being compromised or defaced.