Launching a new blog is an exciting step, and with the right tools, it can be a remarkably straightforward process. This guide provides a complete walkthrough on how to install Pubvana via Softaculous in cPanel. By using the powerful Softaculous auto-installer, you can bypass manual file uploads and database configurations, getting your Pubvana site online in just a few minutes. This method is ideal for anyone using our reliable web hosting solutions.
Table of Contents
Installation Prerequisites
Before you begin the Pubvana setup guide, you only need one thing. Ensure you have your login credentials for your cPanel hosting account. If you are having trouble accessing your account, you may need to reset your cPanel password to proceed with the installation.
Step-by-Step Pubvana Installation Guide
Follow these instructions carefully to ensure a smooth and successful Pubvana installation. Each step is designed to be clear and easy to follow, even for those with limited technical experience.
- Log into Your cPanel Account
Start by logging into your cPanel dashboard using the credentials provided by your hosting provider. - Locate the Softaculous Apps Installer
In the main cPanel interface, scroll to the Software section. Click on the Softaculous Apps Installer icon to open the auto-installer panel. This tool simplifies the installation of hundreds of web applications.
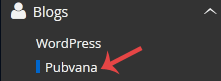
- Find Pubvana in the Blogs Category
Once you are in the Softaculous panel, look for the navigation menu on the left side of the screen. Expand the Blogs category, and then click the Pubvana link that appears in the list.
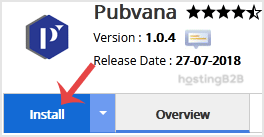
- Initiate the Installation Process
On the Pubvana overview page, click the Install Now button to begin the setup and configuration process.
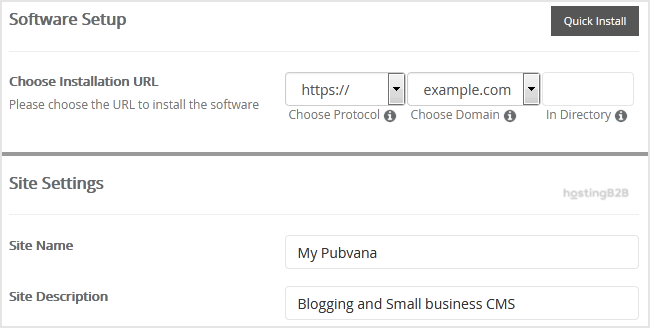
- Configure the Installation URL
Under the Software Setup section, you must define where Pubvana will be installed.- Choose Installation URL Select the correct protocol (http or https) and the domain name from the dropdown menus.
- In Directory This field is optional. If you want to install Pubvana in a subfolder, such as example.com/blog, enter blog here. To install it on your main domain, leave this field empty.
- Define Your Site Settings
Next, move to the Site Settings section to name your new blog.- Site Name Enter the name of your website. This will be visible to your visitors.
- Site Description Provide a short description or tagline for your site.

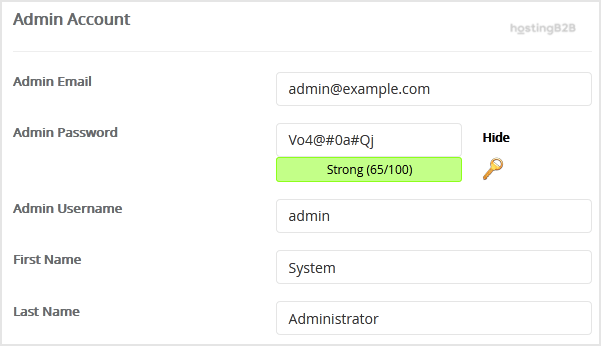
- Create Your Administrator Account
In the Admin Account section, you will create the login details for managing your Pubvana blog. It is critical to use strong and unique credentials here.- Admin Username Choose a unique username. For security, avoid common names like “admin” or “administrator”.
- Admin Password Create a strong, complex password.
- Admin Email Enter a valid email address. This will be used for notifications and password resets.
- First Name Enter your first name.
- Last Name Enter your last name.
Important Note Be sure to copy your admin username and password and store them in a secure location. You will need these details to access the Pubvana admin dashboard later.
- Review Advanced Options
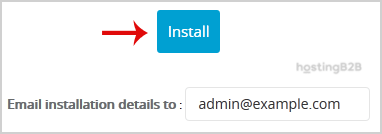
This section can typically be left with its default settings. You can change the database name or configure automated backups here. While automated backups are useful, be aware that frequent backups can consume significant disk space. We always recommend a strategy that includes regular website backups. - Complete the Installation
Finally, scroll to the bottom of the page and click the Install button. Softaculous will now handle the entire installation process automatically.
Verifying Your Pubvana Installation
Once Softaculous completes the installation, it will display a success message along with two links. One link is for your new website’s homepage, and the other is for the administrative login page. Click the administrative URL and use the admin username and password you created during setup to log into your new Pubvana dashboard for the first time.
Next Steps for Your New Blog
With Pubvana successfully installed, you can now focus on building your content. Explore the dashboard to familiarize yourself with the settings, customize your site’s appearance, and write your first blog post. To manage your site effectively, you may also want to configure a professional email account for your new domain.
Frequently Asked Questions
Pubvana is a lightweight and straightforward blogging platform designed for simplicity and ease of use. It provides essential features for publishing content without the complexity of larger content management systems.
Softaculous automates the entire installation process. It creates the database, configures the necessary files, and sets permissions correctly, which saves you time and reduces the risk of manual errors.
Yes. During the installation steps, in the “In Directory” field, you can specify a folder name like “blog”. This will install Pubvana at yourdomain.com/blog while leaving your main domain untouched.
Pubvana typically includes a password reset feature on its login page that uses the admin email address you configured during installation. If that fails, you may need to reset it directly in the database via a tool like phpMyAdmin in cPanel.
Pubvana is an excellent choice for users seeking a simple, focused blogging experience. For those who need more extensive features, plugins, and themes, you might want to explore how to install other popular blogging platforms like WordPress, which is also available in Softaculous.